One of the first things you should invest in as a photographer is a robust backup solution. It’s always prudent to adopt a multi-pronged solution with on-site and off-site backups. If you’re using a Mac, Time Machine is a great out-of-the-box solution for automatic on-site backups that you don’t have to think about. A crash course on Time Machine setups If you’re using an iMac, Mac Mini or Mac Pro desktop computer, the experience is pretty seamless.
You just have to leave a large external hard drive plugged in and the operating system will take care of the backups for you. If you’re using a portable MacBook/Air/Pro, then the experience is a bit more clunky.
You have to remember to plug in the large external hard drive periodically overnight for backups to occur. Forgetting to plug the large external hard drive in for two weeks means you can potentially lose two weeks worth of data. The true automatic solutions for portables came from either buying Apple’s Time Capsule, connecting a hard drive/NAS to a router that officially/unofficially supports Time Machine, or runing macOS Server on a separate mac that is switched on 24/7. Apple’s Time Capsule has not been updated for years and I would not recommend buying one at this point. Download vpn for mac.
Partitioning your Mac is basically splitting your hard drive into separate, usable systems. It makes it possible to run two separate operating systems on one device, like Windows and macOS or two versions of macOS (like High Sierra and Mojave). How to Install MacOS Sierra 10.12 Beta Safely & Dual Boot El Capitan Jun 20, 2016 - 22 Comments Creating a dual boot environment is an ideal solution for Mac users who want to install and try macOS Sierra but without interfering with their primary stable Mac OS X El Capitan installation.
I’ve tried connecting a hard drive to several routers and have had two fail within a few months, maybe the fact that most of these routers do not allow the hard drives to go into an idle state has something to do with it - but I digress. Sharing Time Machine disks on a Mac that’s always on your Network Apple has always provided an option to share a mounted hard drive as a Time Machine Disk if you had macOS Server running on the host Mac. Thankfully that functionality is now integrated into High Sierra. You can use any Mac that is preferably permanently switched on at home for this. I will be referring to this Mac as the ”Hub Mac” for the rest of this guide.
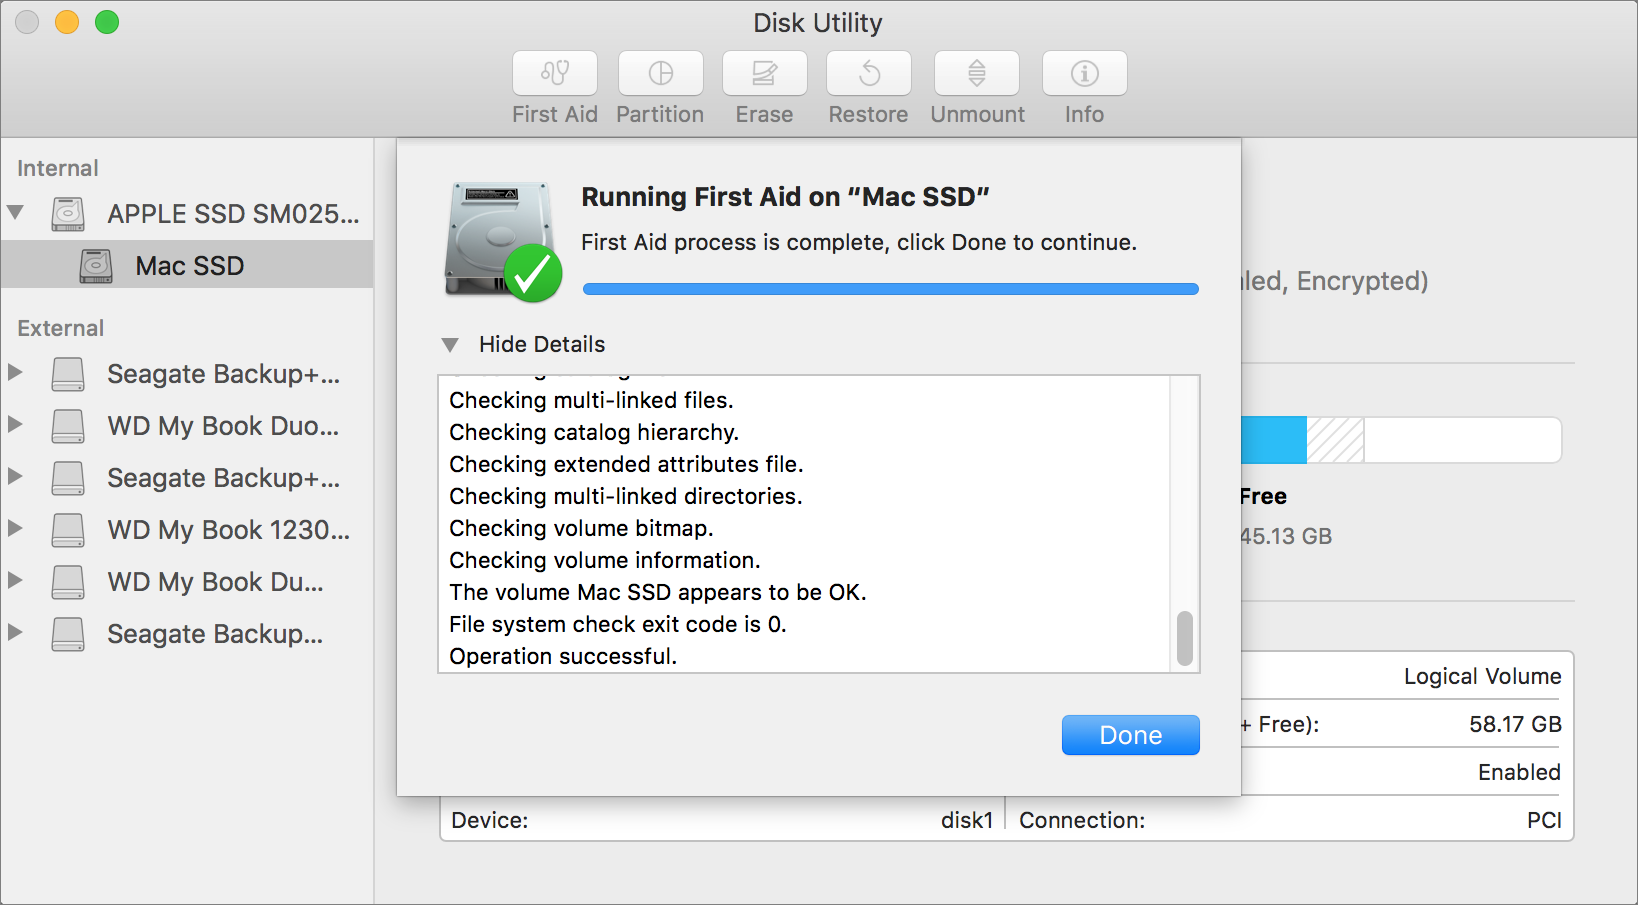
All the other Macs that are going to be backing up to the Hub Mac will be called the ”Satellite Macs. I’ve recently purchased an iMac that plays the role, but you can use any other Macs, included old MacBooks that may be lying around unused. Step 1: Erase the external hard drive You’ll want to make sure the drive is formatted correctly before proceeding. • Connect the external hard drive that you want to use as a shared Time Machine Drive to the Hub Mac • Open Disk utility in Applications -> Disk Utility.
• Select the correct volume that you want to erase. • Click Erase. • Make sure format is set to “Mac OS Extended (Case-sensitive, Journaled)”. You can name it whatever you want. • Click Erase. Step 2: Set up a local Time Machine backup If you need the Hub Mac to be backed up to this hard drive on Time Machine, you’ll want to set it up before adding the Satellite Macs. Note that you cannot encrypt the backup as doing so will encrypt the entire drive.
If you require encryption, consider backing up to a separate hard drive. • Open System Preferences -> Time Machine. • Select the disk and click “Use Disk”. Your Hub Mac will now use the disk as a Time Machine backup volume. Step 3: Set the drive as a shared Time Machine drive on the Hub Mac This step uses the new feature on macOS High Sierra.
• Create a folder called “Shared Time Machine” on the drive • Open System Preferences -> Sharing. • Make sure that File Sharing is checked.
• Click Options and make sure 'Share files and folders using SMB' is checked • Click on ‘+’ under ‘Shared Folders’. • Select the “Shared Time Machine” folder and click ‘Add’. You should now see it under ‘Shared Folders’. • Ctrl + Click (right click) on the drive you just added and select ‘Advanced Options’. • Check ‘Share as a Time Machine backup destination’. Enter a limit if you want, this will be a total limit for all the Satellite Macs that you will be connecting.