Jun 26, 2018 - In this feature we look at the Kodi add-ons that open up the true. Previously you had to search for PLEXBMC to find this essential app, but now. Feb 5, 2017 - Today, it is available for Windows, Linux, Mac OS X, Android (now in the. Then, you should list out all your favorite Kodi add-ons and check to see if. It for the first time, it is good to perform these basic configuration steps.
Essential Addon Kodi Follow the below instructions to install Essential Addon on Kodi 17 Krypton 01. From the main screen of Kodi click on Addons 02. Now click on Settings Icon that you can see at the top left side of your screen 03. Select Addons option and click on Unknown Sources option to enable unknown sources on your Kodi 04. Once you will click on Unknown Sources option you will get a popup window, then press Yes 05.
It used to be the case that you had to download the extension VLSub to download subtitles on VLC, but the handy feature is now fully integrated into the player. If you are using VLC to watch movies, this explains how to use the excellent Download Subtitle feature on VLC. Vlc. VLC for Mac OS X VLC is a free and open source cross-platform multimedia player and framework that plays most multimedia files as well as DVDs, Audio CDs, VCDs, and various streaming protocols. VLC is a free and open source cross-platform multimedia player and framework that plays most multimedia files, and various streaming protocols. Generally vlc media player shows subtitles automatically, you don't need to set anything. Just download subtitles. And put it in the same folder with the movie. It will be.srt or.sub file format. If you are watching titanic.avi. You will have to rename it as titanic.srt. Means names should be the same of movie and subtitle file. If you want to get subtitles automatically for movies in VLC Media Player, then you can simply do it with the help of a VLC add-on called VLSub. It is the highest rated add-on for the player due to its usefulness. Once you download and install the simple plugin, it will automatically search for subtitles for the current movie that is being played.
Now you need to return back to the main screen of Kodi by pressing the return button(Back arrow) 06. Click on Settings Icon that you can see at the top left side of your screen 07. Click on File Manager 08. Click on Add Source 09. Click on None(Textbox) and Keyboard will popup on the screen 10. Type in the web address and click on Done 11.
After that click on TextBox underneath “Enter a name for this media Source”, type onenationand click on OK 12. After that, you need to return back to the main screen of Kodi by pressing the return button(Back arrow) 13. Click on Addons 14.
Now click on Addon Browser Icon that you can see in the top left corner of your screen 15. Click on Install From Zip File 16.
Click on onenation 17. Click on repository. Onenation.x.x.zip 18. Wait for Addon enabled notification at the bottom right corner of the screen 19.
Click on Install from Repository 20. Click on Onenation Repo 21. Click on Video Addons.
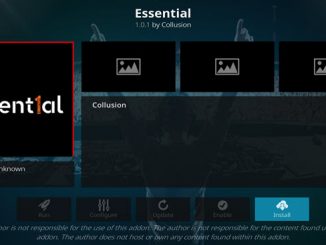
Click on Essential 23. Click on Install and then wait for Addon enabled notification at the bottom right corner of the screen Essential Addon is now installed. The Addon can be accessed by going back to the main screen of Kodi > Add-ons and there you will find Essential Addon Follow the below instructions to install Essential Addon on Kodi 16 Jarvis: 01. Start your box as normal and then go into Kodi 02. Once you will be inside Kodi then select System from the main screen of Kodi and then click on File Manager 03.
Click on Add Source 04. Click on None(Textbox) and Keyboard will popup on the screen 05. Type in the web address and click on Done 06.
After that click on TextBox underneath “Enter a name for this media Source”, type onenation and click on OK 07. After that, you need to return back to the main screen of Kodi by pressing the return button(Back arrow) 08. Click on System 09. Click on Addons 10.
Click on Install from zip file 11. Click on onenation 12. Click on repository. Onenation.x.x.zip 13. Wait for Addon enabled notification at the bottom right corner of the screen 14. Click on Install from Repository 15. Click on OneNation Repo 16.

Click on Video Addons 17. Click on Essential 18. Click on Install and then wait for Addon enabled notification at the bottom right corner of the screen Essential Addon is now installed.