
Mac system is very secure than other desktop OS. And something different than other OS as well. Usually, We got so many new features along with ups and downs on every macOS update. However, with this macOS update, NTFS drives aren’t compatible with Mac, Drive not showing after use on windows. You can use the NTFS drive but not entirely as you can only read the NTFS drive, but you cannot perform write operation like creating or editing documents, Copy Some Documents or Folders. This leads to inconvenience for Mac users.
How can the answer be improved? How to use a PC-formatted drive on the Mac. Reformat the drive using Apple's Disk Utility software and the company's HFS+ file system instead. NTFS for Mac.
You need to take this action in such cases like USB drive used on Windows, But Your Mac Didn’t show Drive, Drive won’t open to use. Eventually, there are various methods available which can be useful to read and write on NTFS drive. Yes, you can write on NTFS drive on your latest macOS Mojave. After following the guide, you can quickly create new files which can be stored in the NTFS drive along with editing, deleting, copying and much more functions will be supported on NTFS drive. So let’s get started with how to write on NTFS on Mac on macOS Mojave and Earlier. Step #7: Remove the NTFS (USB Drive) and reconnect it.
Step #8: Now we will access it, Launch “ Finder” and click on “ Go” and then open “ Go to folder.” Step #9: Type “ /volumes” and proceed by clicking on “ GO.” Step #10: Now you will see NFTS drive, and if you want to make changes then you can manipulate it in your way. To undo this operation, you have to remove the line that we had added to the nano editor. Part 2: Change the Drive Format to exFAT EXFAT format isn’t compatible with macOS Mojave, so may face problems while accessing the files on NTFS drive. The best way to fix this issue is to convert the NTFS drive to exFAT format so that you can easily access any file on both platforms without any interruption. You can change the form right from the macOS. Here’s how to change the drive format to exFAT in macOS Mojave. Step #1: Open the “ Disk Utility” from the Spotlight.
Step #2: You have to erase the drive before changing the format of any drive. Select the drive and click on “ Erase.” Step #3: Next, select the “ EXFAT,” and then click “ Erase.” Within minutes your drive will be ready with the new exFAT format.
Suggestions This tutorial will help in using NTFS Drive on Mac. But you have an alternate option that easy and fixes the problem like this all the time for future use. Dual OS supported. Drives are available in the market. I would like to suggest. To use this drive on different System: MacOS and Mojave you don’t need to reformat.
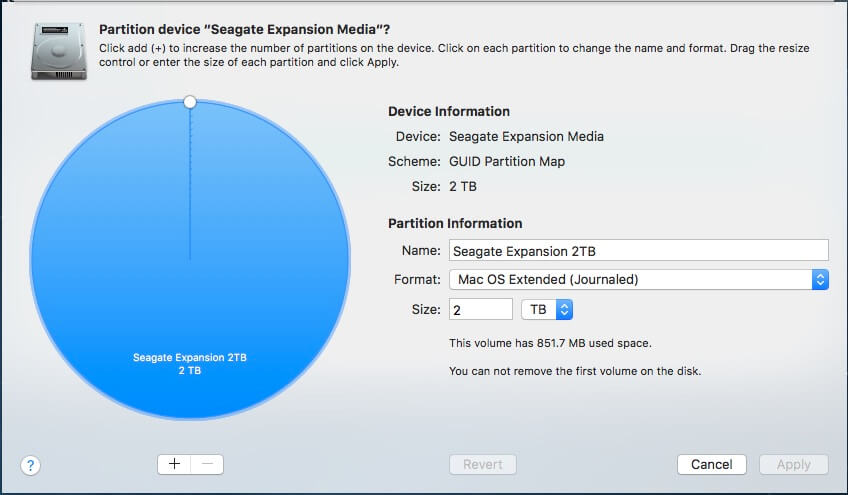
How to Format an External Drive in Windows 1. Connect the drive to your Windows PC. Open the Disk Management tool. You can do that by typing 'disk format' or 'disk management' in. Right-click on the external drive's partition or unallocated space you want to format. Follow the wizard. In the Disk Utility app on your Mac, choose View > Show All Devices. In the sidebar, select the disk or volume that you want to format to use with Windows computers. Click the Erase button, click the Format pop-up menu, then choose one of the following: MS-DOS (FAT): Choose if the size of the disk is 32 GB or less.  Launch Disk Utility and then click to select the external hard drive listed on the left. Click the 'Erase' tab, choose a volume format from the drop-down menu and then type a name for the drive. The Mac OS X Extended volume format is optimal for Macs; the Journaled option enables the system to log and keep track of files. Disk Utility, a free application included with the Mac operating system, is a multipurpose, easy-to-use tool for working with hard drives, SSDs, and disk images.